Mix Professional Sounding Audio with these 5 Top Tips
Get impactful, well balanced and exciting mixes with clarity, by following these easy-to-follow guiding principles for mixing to picture

Looking to get professional sounding mixes for picture? Look no further than this guide to creating well balanced, impactful mixes with clarity.
Rule #1 – Everything can’t be loud
Balance is everything in a mix. I say again – balance is EVERYTHING in a mix. Over time you will develop a good sense for how loud things should be, but the main difference between professional mixes and those that…. aren’t… is dynamic range.
This applies both in a macro sense and a micro sense.
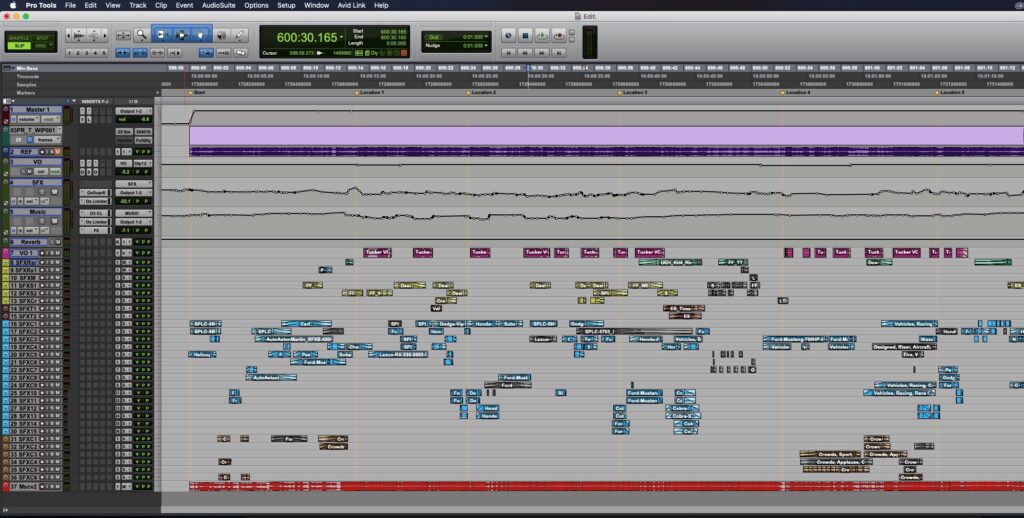
Macro – The film overall must have dynamic range along the timeline in order to maintain audience interest, avoid fatigue, and create more impact. It’s good to start strong, ebb down in the middle, and build to a strong finish. You also need some separation between the VO, dialogue, music and SFX, so all of these components can’t be the same volume, on the whole.
Micro – Sounds are more interesting when they have dynamic range. If your SFX are all flat, your mix will sound flat. For consistency, SFX are often compressed quite a bit, so I often add automation back in to specific components to make them more exciting ingredients to my mix. Which brings me onto the next tip…
Rule #2 – Automation is key
Automation is really important to avoid static, boring mixes and maintaining interest. Things need to be moving. The best way to achieve this is with a control surface, which allows you to ride faders to write automation in to the mix. The key thing here is that you are using feel to react to what is happening on screen, so if you don’t yet have one, you can still use the faders with touch automation enabled, to push and pull the volume on the fly.
Automation isn’t just limited to volume though; any effect, send, panning or setting can be automated in your DAW or even edit suite, and by dynamically changing these settings throughout you can build exciting mixes and avoid static boring ones.
Rule #3 – Voices are the most important thing
This is so important I nearly put it at #1, but I wanted to establish some foundational stuff first.
A key sign of an inexperienced mix engineer is that voices are balanced too quiet, fighting with music or SFX, or even at times completely lost. Intelligibility of your voices is critical and non-negotiable. I set up my mix sessions so that everything else yields to voice.
This doesn’t only apply to volume. Music and SFX should be EQ’d to allow space for the voices to sit in. I use a combination of static and dynamic EQ to build space in the frequency spectrum for voices to cut through.
Rule #4 – Clean up and reinforce your dialogue (and voice over) tracks
First, edit out any gaps in the dialogue or voice over, and reduce or completely remove any breaths or artefacts.
Depending on how and where dialogue was recorded, you may need to clean up the sound with noise removal tools like IzoTope RX. This professional noise removal suits includes de-reverb, de-hum, de-click, and so on. If you don’t have some specialist noise removal software, edit out any noise manually, and use a dynamics expander to bring extra clarity to the transients. You can also automate the volume to make consonants louder, because it is here that intelligibility really lies.
The reality is that one voice versus a harmonically dense music track + harmonically dense sound effects, is going to struggle to cut. Unless you bolster up the sound (or drop the volume of the music & SFX until you have a quiet mix). Add harmonics to the source, and use two stages of compression to bring the voice up to level, in a transparent way.
EQ your voices, adding some 10kHz for extra HF content, while cutting around 6kHz to remove harshness. You’ll need to find and adjust the exact frequencies to taste, but these are great starting points. Don’t make it too tinny or harsh, and use a de-esser to control the boost.
Rule #5 – Master bus processing
If you’ve followed the steps above, you should be on the way to a dynamic mix that ebbs and flows. And your vocals should be crystal clear and have lots of space. On the master bus we’re just looking to tuck everything in a little bit, add some final polish, and bring up to final volume.
It’s important however that your master bus isn’t doing too much work. Avoid heavy pumping on the compression and also to ensure that the stems you deliver are close to the final mix. There are a few plugins, but they’re all set for subtle work.
My master bus processing goes like this:
- Compressor – very low ratio, low threshold, fast attack, fast release – for general, gentle levelling
- Character EQ – I add a modelled Pultec EQ with no boost or cut, usually just running through the circuit
- Dynamic EQ – Waves F6, just to catch and tuck in any excess midrange or HF
- Limiter 1 – I prefer the Oxford Limiter, hard knee, with some Enhance enabled
- Limiter 2 – brings up from broadcast spec (-23 LUFS) to online (typically -14LUFS)
- Loudness Metering – LCAST Loudness Meter by MeterPlugs
- Time – For tracking time spent on sessions, I used the HOFA ProjectTime plugin
David Bartley is a freelance Sound Engineer and Sound Designer based in London, United Kingdom
See portfolio examples of audio post production services here
